Customizing Surface Abrading for a Perfect Finish
O.C. Tanner developed a one-stage method for applying different abrasives to both sides of the medals, medallions and awards it creates...
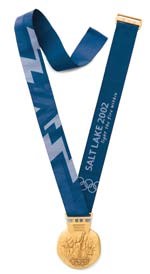
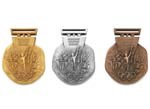
O.C. Tanner (Salt Lake City, UT) turns metal into emblematic products: medallions, awards, pins and other service recognition items. The recent winter Olympic medals are good examples of our end products. The variety of metals we work with is always expanding. New plating and finishing materials are continuously introduced. This means we must continually review and update our manufacturing processes to keep up with the needs of the new materials we deal with.
Designing In Metal
Most of our products are customized and basically begin with a drawing of what the customer wants; it is very similar to the production of a coin. The approved art rendition is then sent to a CAD/CAM machine where the design is cut into metal to make a die. One of the most common product die is about 2 inches in diameter. All die, regardless of size, are made of heat-treatable steel. After the die is made, a blank piece of metal, be it copper, 10k or 14k gold is pressed into the die with several tons of pressure to create a relief of the art rendition in the desired metal format. The piece is removed from the die and scrap is trimmed to the shape of the end product.
Requirements For Plating and Finishing
The front of these emblems must be clean of all surface contamination that may repel plating materials. The metal must also have a very slight texture to it to give plating materials a good surface to cling to. There can be no shiny spots. The finish of the base metal must be smooth and consistent for even plating.
Base materials can be virtually any metal including silver, bronze, copper and 10 or 14 karat gold. Plating and finishing are added to both create different surface appearances and also to protect the product. Some plating finishes include rhodium, roman or antique look, yellow gold, and antique silver plating. For instance, we might want to add a color tint to the metal such as green antique. Each plating formula gives a different finish.
Plating is accomplished by dipping the base metal into a liquid plating solution. Depending on the type of plating and the finish desired, the process could include anything from a single dip to a multi-step dipping process. The timing of the dip is also highly dependent upon the type of finish desired and the base material plated. Each type of material must be paired with the steps for the desired finish and then it must be individually processed through the series of steps needed to create that particular product.
After our plating process is complete, we may highlight the final product. To create a special color or appearance (perhaps give it a shaded look), we may use a special product that is similar to a liquid "toner." This can give a different appearance with a subtle dark shading or light shading. This is a manual step and a sponge is used in this process.
Like any plated metal parts or surfaces across a wide range of industrial applications, the adhesion of the plating materials to the base metal is key to both the appearance and durability of the end product. Whether it is one of our medallions or other awards, or a part for an automobile or industrial tool surface, plating a base metal is the same. It is imperative that the bond between the two is virtually melded into a single surface, even though they are different materials. To accomplish this we have experimented with quite a few methods of surface preparation. As I mentioned earlier, how the surface is prepared is paramount to the degree of success in the surface plating process.
Initial Surface Preparation Becomes A Messy Business
We typically have to do separate processes to make sure our plating process bonds completely to the surface of the metals. Using a medallion as an example, an aggressive surface texturing for appearance and plating needs to be done on one side and on the other, texturing for plating adhesion must be done with a milder abrasive process that does not compromise the bas-relief of the design.
To accomplish this, we used aggressive sandblasting technology on one side and wet pressure blasting technology on the design side. Wet Pressure Blasting is used typically for parts cleaning in a variety of machining situations, and it did work for our application. However, it was slow and messy. The wet pressure blasting was operator activated, and there were large units of used water mixture that had to be disposed of. The two processes (wet and dry blasting), by necessity, had to be completely separate, and there was a time delay needed to completely dry the product after wet blasting before it could be presented to the other type of blasting. The affect on the final product was good, but the excessive time to do the two separate processes, was hurting output. Our goal was to process 1,000 emblems in an eight-hour shift, and, just from the surface texturing point of view, this was not happening.
The First Step to a Solution
Our first goal was to find a replacement for the wet pressure-blasting step that would be equally effective or better on the various metal surfaces. It had to texture without eroding the images in any way. We also wanted a technology that would be much faster and cleaner to use. The second goal was to find a way to combine the two processes: sandblasting and a more gentle abrasive texturing into a single production step if at all possible.
MicroBlasting technology appeared to be the solution to the wet blasting problem. It was also operator activated but much cleaner and a dry process. It could also be easily automated if needed, which was a plus. The process works by selectively blasting a very fine abrasive powder against a surface. In our case, we started with, 50 micron crushed glass. This was mixed with a clean dry air jet and propelled at between 30-60 psi through a pencil like stylus tipped with a round nozzle that had a 0.125-inch orifice. The process required a dryer, dust collection and filtration unit, but we already used that type of equipment for the sandblasting process, so it did not pose a problem.
Modifying Two Technologies In-House For a Real Fit
Although the MicroBlasting technology fit our needs, we were not completely satisfied with the initial abrasive powder we tried and found others that suited our finishing applications better. We presently use aluminum oxide, which is a little more aggressive, and glass beads, which produce an entirely different peened surface texturing. We also found that the best blast pressure for our applications runs around 60-80 psi using these abrasives. However, on the negative side, we soon saw that this new media plugged up our micro nozzles quite a bit. As a solution, we simply opened up the orifice in the nozzle a little more and the process worked extremely well.
MicroBlasting technology cleaned all the various types of metal we use. It removed all oxides and surface impurities and also created an evenly textured surface that the different platings adhered to very well. The more aggressive sandblasting worked equally as well on the reverse side of medallions to provide a special look to the metal finish.
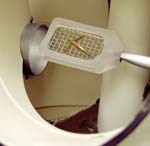
Both types of blasting had their own separate work chambers, but neither was just what we wanted. Our desire was to create a one-piece flow; therefore, we built our own blasting workstation out of PVC using the primary parts of both the MicroBlasting and sandblasting systems. The result was a single unit that gave us MicroBlasting technology to provide the gentle abrasive cleaning and texturing on the design surface of the metal and sandblasting technology to provide the more aggressive abrading of the backside of the product's metal surface. With our custom fixturing, the resulting units now allow us to spray the gentle abrasive media on one side of an array of medallions, push another button and abrade the backside with the more aggressive type of blasting. The filtration unit carries away the mixed abrasives from both processes in one step for disposal.
From this one step blasting station, the medals, medallions, awards or any type of metal product we make moves to the appropriate plating and finishing process step as described earlier.
Meeting and Exceeding Our Goal
Today, we have approximately 15 of our customized MicroBlaster/sand blaster combination units in our main facility and more in our Canadian plant. We do also use MicroBlasting technology for different types of "aesthetic" surface finishing at times, such as peening metal with the glass bead media for a satin finish, but basically it is used to make sure our platings adhere to all the different metal surfaces we use. It does that job very well.
We are currently running batches of 10-15 units at a time through our blasting process stations. I estimate that our overall production has gone up by 30-40% because of the reliability of the MicroBlasting process combined with the substantial time we saved by in-house customization; combining two process steps into one unique piece of production equipment.
To learn more visit Comco Inc..
Read Next
Education Bringing Cleaning to Machining
Debuting new speakers and cleaning technology content during this half-day workshop co-located with IMTS 2024.
Read MoreA ‘Clean’ Agenda Offers Unique Presentations in Chicago
The 2024 Parts Cleaning Conference, co-located with the International Manufacturing Technology Show, includes presentations by several speakers who are new to the conference and topics that have not been covered in past editions of this event.
Read MoreEpisode 45: An Interview with Chandler Mancuso, MacDermid Envio Solutions
Chandler Mancuso, technical director with MacDermid Envio discusses updating your wastewater treatment system and implementing materials recycling solutions to increase efficiencies, control costs and reduce environmental impact.
Read More




.jpg;maxWidth=300;quality=90)


