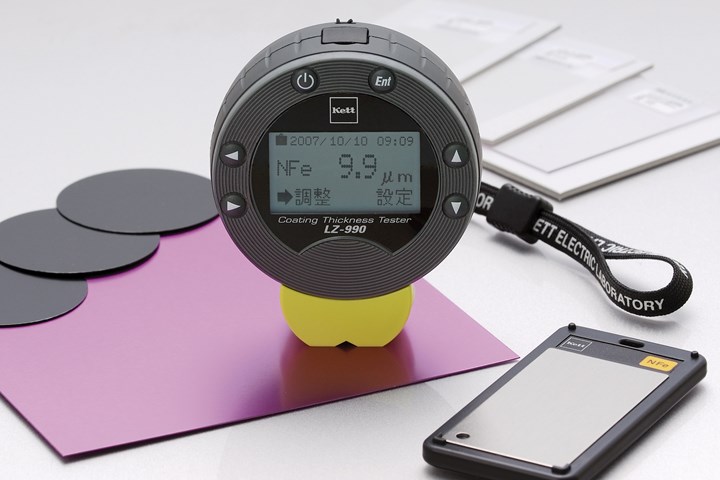
Desktop, online and inline testing solutions are cost-effective analytical tools that can quickly determine a wide range of critical coating properties.
Photo Credit: All photos courtesy of Kett U.S.
Industrial coatings applied to substrates like metal, plastic, glass and composite protect various products from corrosion and damage to extend lifespan. Commercial coatings are also routinely applied to wood, metal and concrete structures to protect against mechanical, chemical and environmental degradation while improving aesthetics. To ensure quality, manufacturers that utilize or formulate coatings rely on various methods of testing to determine resistance to friction, peel, wear and scratches.
Without the necessary adhesive strength or durability, it is possible for a coating to bubble, flake, peel, or otherwise fail prematurely. Depending on the application, this can cause costly warranty issues as well as safety issues that can compromise the manufacturer’s reputation and market share.
As an example, for several years a popular minivan struggled with paint blistering and bubbling in the heat, direct sun, and exposure to road salt in northern regions.
“Paint and primer would start to flake off some vehicles in a matter of just a few months, leading to rust spots and an undesirable finish. The auto manufacturer could have avoided damage to their reputation and financial loss from warranty claims with more thorough coating testing using the proper measurement equipment,” says John Bogart, managing director of Kett U.S., a manufacturer of a full range of testing instruments for adhesion, peel and wear measurement.
To create reliable coatings or products that utilize them, engineers and quality assurance teams require reliable test instruments to verify that the necessary properties and industry standards are met, particularly for high-value or high-volume applications.
Although desktop and inline process analyzers are available, the challenge is that conventional coating test equipment typically offers a limited range of functions. Consequently, multiple instruments are often required. There are also other issues with traditional testing methods that make them inconsistent, laborious and time-consuming.
As a result, some industry suppliers now provide a wide range of coating measurement equipment that performs like a “Swiss army knife” with multi-functional testing capabilities that allow greater flexibility and productivity. These desktop, online and inline testing solutions are cost-effective analytical tools that can quickly determine a wide range of critical coating properties.
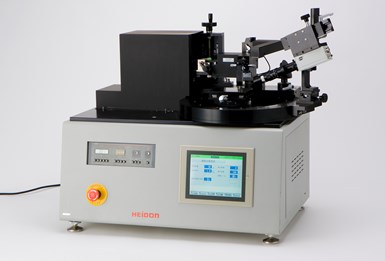
Multi-function Kett multitester.
All-in-One Desktop Units
When various coating properties need to be tested, a desktop all-in-one unit, like Kett’s 14FW, offers a significant amount of flexibility in a single machine with assorted jig attachments for specific tests. The device tests and measures multiple coating properties including friction, wear, peel and scratch resistance.
The all-in-one unit provides exceptional flexibility to test coatings. By changing the jig attachment, the contact mode in friction and wear testing can be modified, and scratch intensity and peeling resistance tests can be performed. By presetting the speed of table movement, stroke length, and stroke count, the tester can provide testing under various conditions.
The unit can also measure scratch resistance. This is expressed based on the size of the scratch made by a conical scratch test pin while a predetermined vertical load is applied. A pencil scratch intensity test can also be performed.
According to Bogart, conventional testing equipment utilizes substantial “force” that can damage the substrate material, so 10 tests or more may be needed to be conducted and averaged.
Since the H14FW unit utilizes much less force, it is more subtle and can be used to compare coatings on various substrates or items that are challenging to coat.
“The unit can detect very slight nuances in coating formulation batches. This allows manufacturers to confidently make critical coating decisions involving considerable capital, knowing they are making the best choice and proceeding correctly,” Bogart says.
Continuous Coating Testing
The industry has developed benchtop instruments that enable the real-time testing of changes in frictional resistance due to wear when this is required. As an example, Kett’s H40 Friction and Wear Tester uses a balance arm that crosses the feed table at right angles in forward and backward motions to measure frictional forces with very high accuracy.
The unit, which is equipped with a load converter containing a probe integrated into a holder, continuously measures changes in frictional resistance due to wear. The stroke count at which a coating peels, or its surface condition changes, is determined from an increase or decrease in the frictional resistance of the balance arm as it moves back and forth.
For greater precision, manufacturers can set the stroke length of the reciprocating balance arm from 1 to 100mm and automatically stop it when the desired travel distance is reached. The frictional resistance between the coating and the balance arm can be measured very precisely, from 0 to 9.8N.
Quality assurance technicians can use a variety of measurement jigs including those for point contact measurement (i.e., scratch test pin and ball indenter), plane contact (i.e., flat indenter), and line contact (i.e., blade holder).
With optional software, various measurements, from static friction coefficient measurement to wear measurement, can also be performed.
Although coatings are generally measured dry, testing a wet coating is possible with an addition that enables heating a sample to maintain the coating in liquid form.
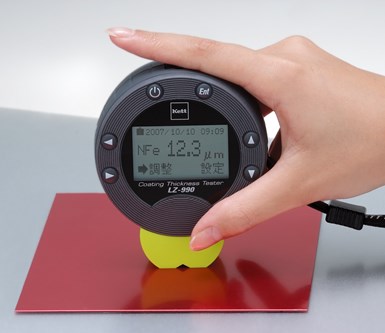
Kett’s LZ990 Integrated Coating Thickness Gauge.
Measuring Coating Thickness
To ensure consistent quality, OEMs also need to determine that a coating is evenly applied at the appropriate thickness.
“Applying too little of a coating risks poor product protection and aesthetics, and applying too much wastes money,” Bogart says.
To simplify quality control, instant gauges like Kett’s model LZ990 allow users to measure coating thickness with a simple, non-destructive test. As a quality check that can improve product consistency with great precision, the device displays thickness in either mils (.001 inch) or microns (.001mm) to the thousandth decimal place.
Inline Composition Analyzers
In high-value applications, manufacturers may also want to analyze the composition of specialized coatings. Advanced composition analyzers utilize near-infrared reflectance (NIR) to provide accurate measurement of coatings without sampling, physical contact, or degradation. These units are available in desktop, online and inline models.
“With NIR, the surface of the coating, whether solid or liquid, is measured and light is absorbed by the chemical components. The detected absorbance is converted into component values,” Bogart explains.
NIR devices can also be used to analyze moisture, film thickness, and coat weight, which can simplify the process for users by allowing them to measure multiple properties with just one instrument and software.
Since measurement is instant, the instrument eliminates the need to take samples to a laboratory and put production on hold. With pinpoint accuracy, any employee can achieve consistent test results with minimal risk of error, allowing specialized technical staff to focus on other areas of the manufacturing process.
Ensuring essential coating properties are achieved is vital to performance in a wide range of applications and products, so effective measurement is crucial to maintain quality. Manufacturers that take advantage of the most accurate instruments to measure all necessary coating characteristics can assure product quality, as well as protect the company’s brand and reputation.
Kett | 800-438-5388 | kett.com
Del Williams is a technical writer based in Torrance, California.
Related Content
NASF/AESF Foundation Research Project #121: Development of a Sustainability Metrics System and a Technical Solution Method for Sustainable Metal Finishing - 15th Quarterly Report
This NASF-AESF Foundation research project report covers the twelfth quarter of project work (October-December 2023) at Wayne State University in Detroit. In this period, our main effort focused on the development of a set of Digital Twins (DTs) using the Physics-Informed Neural Network (PINN) technology with application on parts rinsing simulation.
Read MoreOnline Energy Savings Calculator Promotes Energy Efficiency
An online energy savings calculator from AkzoNobel aims to help customers determine how to reduce energy usage.
Read MoreAttention to Measurement
English vs. Metric — which should you use? Ron Kinne of Haviland Enterprises Inc. explains why you need a firm understanding of both for measuring various aspects of plating processes.
Read MoreSUR/FIN 2023: Capsules from the Technical Sessions I: Emerging Technologies
SUR/FIN 2023 in Cleveland this past June was a resounding success. Due to the efforts of the Technical Activities Committee, ably led by Bill Nebiolo this year, an outstanding program of technical presentations was offered. What follows are summaries of selected presentations from the Emerging Technologies sessions. Additional coverage will be provided in this space in the coming months. The full report can be accessed and printed at short.pfonline.com/NASF23Aug1.
Read MoreRead Next
The Importance of Benchmarking Your Application Parameters
Having repeatability issues in your coating process? John Owed of Carlisle Fluid Technologies discusses the importance of benchmarking your application parameters in order to identify and quickly resolve problems.
Read MoreThe Benefits of Benchmarking Surface Quality in Manufacturing
Lucas Dillingham, of surface inspection technology provider Brighton Science, offers insights for consistent, successful adhesion of coatings.
Read MoreBrighton Science and Hubbard-Hall Partner on Data-Driven Cleaning Program
Infinity Surface Cleaning Program offers data-driven approach to preparing surfaces for bonding, adhesion and coating.
Read More


